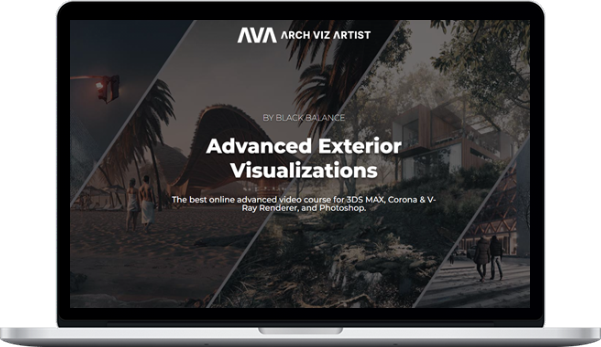
Arch Viz Artist – Advanced Exterior Visualizations Course
$699.00 $137.00
»Within 3 Days
Description
Arch Viz Artist – Advanced Exterior Visualizations Course
Description Of Advanced Exterior Visualizations Course
 Animation created in 3ds max & Corona.
Modules 1 to 3
There is a moment in the artists’ career when they feel that they are good at the craft but they still would like to achieve more. to create better, more engaging, hyper-realistic visualizations that will be admired by others in the field.
This feeling is a sign of the willingness to constantly learning and persistent improvement. The inner desire to grow and to spread the wings, to be better and better every single day.
Do you feel the same? This is a good signal as it means that you are an ambitious, aspiring, and determined soul. With these characteristics you can get everything you want in life. so it simply means that you can achieve every desired level you wish!
Spread your wings
- Are you willing to spread your wings and continue to develop your progress?
Create artwork
- Do you want to make your visualizations something more than just images?
Master your images
- Are you willing to achieve the master level in creating visualizations?
Aim to be the best
- Do you want to beat your competition and be in the group of the top artists in the world?
Get recognition
- Do you want to get recognition in the industry and among your clients?
Select your clients
- Do you want to reach the point when you choose your clients not vice versa?
What will you learn in Advanced Exterior Visualizations Course?
- # 1: Corona & V-Ray Render Engines
You’ll learn how to create advanced visualizations using both render engines – Corona Renderer and V-Ray for 3ds max. During one course, you will learn two most popular renderers that are used in architectural visualization studios around the world so you will be prepared for different scenarios - # 2: Camera Setup & Composition
You will learn the process of selecting a camera angle according to the composition rules as this is one of the most important steps during the process of creating the visualizations. Especially if you want to create advanced visualizations, your cameras should create more than just a shot, they should tell a story per se. It’s not always about creating the most unobvious camera you can think of, sometimes it’s more about simplicity, depending on the effect we want to achieve. - # 3: Advanced Lighting Setup
Lighting is the most powerful tool to capture emotions, it can change the mood, atmosphere, and depth of any image. This is why we pay a lot of attention to this topic in this course. Creating advanced lighting scenarios will be key in creating visualizations that grab the attention of your viewers and that really stand out among others. - # 4: Fog & Volumetrics
You will learn how to use Fog & Volumetrics to your advantage. By using this effect in your visualizations, you will see a huge difference in your works. It influences the realism of the images by adding layers and depth to them. However, it also creates a mood and atmosphere that cannot be achieved without this effect. - # 5: Super Advanced Materials
There is a huge gap between basic materials and advanced ones, and it mainly refers to the level of details. If you understand materials in real life and know how to recreate the complicated materials, your visualizations will jump to a totally new level. During this course, you will learn how to create one of the most complicated materials so after that you will never struggle with creating any material anymore. - # 6: Postproduction
Postproduction is one of these things that can help or break your image. We use postproduction to add mood, atmosphere to the image, to highlight the most important parts of the visualization, to keep general balance and color balance. You will learn this approach across the lessons, this will help you improve your images instead of breaking them.
CURRICULUM
The training program
Module 1 Introduction & Render Engines
- Lesson 1 – Introduction to the training
- Lesson 2 – Corona Render Settings
- Lesson 3 – V-Ray Render Settings
- Lesson 4 – Corona VFB Window
- Lesson 5 – V-Ray VFB Window
- Lesson 6 – Corona Render Elements
- Lesson 7 – V-Ray Render Elements
- Lesson 8 – Corona Proxy
- Lesson 9 – V-Ray Proxy
- Lesson 10 – Corona Cameras
- Lesson 11 – V-Ray Cameras
- Lesson 12 – Corona Lighting
- Lesson 13 – V-Ray Lighting
- Lesson 14 – Corona Lightmix
- Lesson 15 – V-Ray Lightmix
- Lesson 16 – Corona Materials
- Lesson 17 – V-Ray Materials
- Lesson 18 – Corona Fog & Volumetrics
- Lesson 19 – V-Ray Fog & Volumetrics
- Lesson 20 – Homeworks & Certification rules
Module 2 Rainy Street Scene
- Lesson 1 – Scene Overview
- Lesson 2 – Storytelling
- Lesson 3 – Colors’ Analysis
- Lesson 4 – Building Modeling
- Lesson 5 – Glass Facade Modeling – RailClone
- Lesson 6 – Glass Facade Material
- Lesson 7 – Camera Setup
- Lesson 8 – Overall Lighting Setup
- Lesson 9 – Fog Setup
- Lesson 10 – Wet Asphalt Material – Part 1
- Lesson 11 – Wet Asphalt Material – Part 2
- Lesson 12 – Wet Asphalt Material – Part 3
- Lesson 13 – Additional Lighting Setup
- Lesson 14 – Building Materials
- Lesson 15 – Bar Lighting & Materials
- Lesson 16 – Alcohol Placement – RailClone
- Lesson 17 – Rooms’ Assets Placing
- Lesson 18 – Lobby Lighting & Materials
- Lesson 19 – Exterior Assets Placing
- Lesson 20 – Final Changes
- Lesson 21 – 3D People Placement
- Lesson 22 – Render Elements and Settings
- Lesson 23 – Post-production – View 1
- Lesson 24 – Post-production – View 2
- Lesson 25 – Post-production – View 3
Module 3 Snowy Street Scene
- Lesson 1 – Scene Overview
- Lesson 2 – Storytelling
- Lesson 3 – Colors’ Analysis
- Lesson 4 – Building Modeling – RailClone
- Lesson 5 – Glass Facade Modeling – RailClone
- Lesson 6 – Camera Setup
- Lesson 7 – Lighting Setup
- Lesson 8 – Fog Setup
- Lesson 9 – Trees Placement
- Lesson 10 – Snow Material
- Lesson 11 – Building Materials
- Lesson 12 – Snowy Street Material – Part 1
- Lesson 13 – Snowy Street Material – Part 2
- Lesson 14 – Snowy Street Material – Part 3
- Lesson 15 – Snowy Street Material – Part 4
- Lesson 16 – Sidewalk Material
- Lesson 17 – Snow Assets Placement
- Lesson 18 – Creating Snow – Forest Pack
- Lesson 19 – Lobby Asset Placement
- Lesson 20 – Interior Assets Placement – Forest Pack
- Lesson 21 – Exterior Assets Placement
- Lesson 22 – Cars Motion Blur
- Lesson 23 – 3D People Placement
- Lesson 24 – Render Elements and Settings
- Lesson 25 – Post-production
Module 4 Hotel on the Beach
- Lesson 1 – Scene Overview
- Lesson 2 – Storytelling
- Lesson 3 – Colors’ Analysis
- Lesson 4 – Building Modeling
- Lesson 5 – Camera Setup
- Lesson 6 – Lighting Setup
- Lesson 7 – Building Materials
- Lesson 8 – Creating Roofs – Forest Pack
- Lesson 9 – Palm Trees Editing – GrowFX
- Lesson 10 – Trees Placement – Forest Pack
- Lesson 11 – Trees Manual Placement – Forest Pack
- Lesson 12 – Fog
- Lesson 13 – Sand Material – Part 1
- Lesson 14 – Sand Material – Part 2
- Lesson 15 – Sand Material – Part 3
- Lesson 16 – Sand Material – Part 4
- Lesson 17 – Beach Assets Placement – Megascans
- Lesson 18 – Adjusting Sand Material
- Lesson 19 – Adjusting Beach Assets Materials
- Lesson 20 – Interior Assets Placement
- Lesson 21 – Exterior Assets Placement
- Lesson 22 – Small Trees & Plants Manual Placement
- Lesson 23 – 3D People Placement
- Lesson 24 – Render Elements and Settings
- Lesson 25 – Post-production
Module 5 House in the Forest
- Lesson 1 – Scene Overview
- Lesson 2 – Storytelling
- Lesson 3 – Colors’ Analysis
- Lesson 4 – Wooden Cladding – RailClone
- Lesson 5 – Camera Setup
- Lesson 6 – Trees Manual Placement
- Lesson 7 – Background Trees Placement – Forest Pack
- Lesson 8 – Lighting & Fog Setup
- Lesson 9 – Tree Materials Editing
- Lesson 10 – Building Materials
- Lesson 11 – Ground Sculpting
- Lesson 12 – Ground Model Unwrapping
- Lesson 13 – Ground Material – Part 1
- Lesson 14 – Ground Material – Part 2
- Lesson 15 – Ground Material – Part 3
- Lesson 16 – Water Material
- Lesson 17 – Small Plants Placement – Forest Pack
- Lesson 18 – Larger Plants Placement – Forest Pack
- Lesson 19 – Debris Placement – Forest Pack
- Lesson 20 – Assets Placement – Megascans
- Lesson 21 – Small Plants Manual Placement
- Lesson 22 – House Assets Placement
- Lesson 23 – Ivy Model Editing – GrowFX
- Lesson 24 – Render Elements and Settings
- Lesson 25 – Post-production
More courses from the same author: Arch Viz Artist
Delivery Policy
When will I receive my course?
You will receive a link to download your course immediately or within 1 to 21 days. It depends on the product you buy, so please read the short description of the product carefully before making a purchase.
How is my course delivered?
We share courses through Google Drive, so once your order is complete, you'll receive an invitation to view the course in your email.
To avoid any delay in delivery, please provide a Google mail and enter your email address correctly in the Checkout Page.
In case you submit a wrong email address, please contact us to resend the course to the correct email.
How do I check status of my order?
Please log in to HealingCourse account then go to Order Page. You will find all your orders includes number, date, status and total price.
If the status is Processing: Your course is being uploaded. Please be patient and wait for us to complete your order. If your order has multiple courses and one of them has not been updated with the download link, the status of the order is also Processing.
If the status is Completed: Your course is ready for immediate download. Click "VIEW" to view details and download the course.
Where can I find my course?
Once your order is complete, a link to download the course will automatically be sent to your email.
You can also get the download link by logging into your HealingCourse account then going to Downloads Page.


